

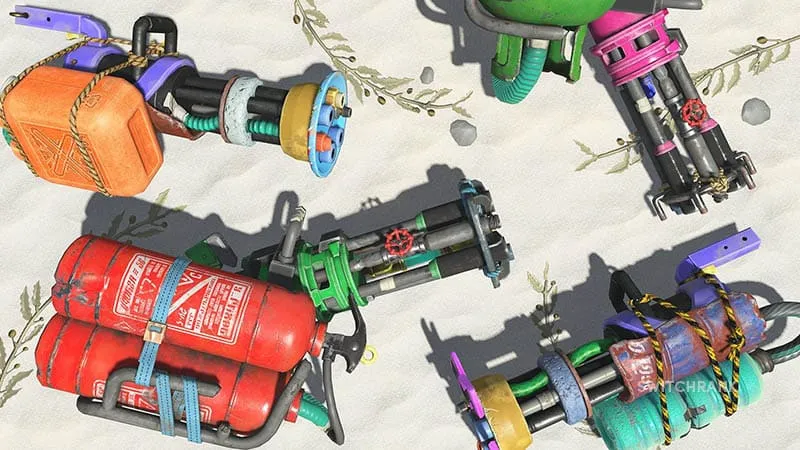
Finding the best weapons and gadgets in Splatoon Raiders is not simply a matter of choosing the option with the highest damage. Salmonids rarely attack from one convenient direction, and a weapon that destroys a single target can quickly become uncomfortable when a crowd blocks your escape.
A reliable loadout should give you an answer for three situations: clearing Lesser Salmonids, damaging stronger enemies and creating enough room to reposition. Your main weapon handles the job it does best, while gadgets compensate for its weak points.
Splatoon Raiders encourages this kind of combination. You can carry two gadgets alongside your weapon and switch between them while the others are cooling down. Nintendo’s developers have described this constant rotation as one of the central ideas behind the combat system.
This guide explains which weapon types work well against Salmonids, how each Tank changes your available gadgets and which combinations are worth testing first.
How Weapons and Gadgets Work Together
Splatoon Raiders gives you access to a large collection of weapons, including variations with different statistics and additional powers. Two weapons from the same family may therefore feel very different once their bonuses and upgrades are taken into account.
Instead of judging a weapon only by its class, look at what it contributes to your complete loadout. A Charger may deliver excellent ranged damage but leave you vulnerable at close range. A Blaster can break apart a packed group, yet struggle to paint a quick escape route when enemies close in.
Gadgets exist to solve those problems.
The gadgets you can equip are initially determined by your chosen Tank:
- Speed Tank focuses on mobility and rapid repositioning.
- Power Tank provides direct attacks and tools for breaking through enemies.
- Tactical Tank uses deployable devices and ranged battlefield control.
Each category supports a different style rather than functioning as a simple upgrade over the others. Nintendo also allows weapons and gadgets to be strengthened with materials gathered during raids, giving individual tools more specialised roles as you progress.
A practical rule is to identify the moment when your weapon becomes uncomfortable, then select a gadget that prevents it.
If your weapon is slow, add mobility or passive protection. If its range is limited, take a deployable attack. When a weapon requires careful aiming, use crowd control to protect the time needed to line up a shot.
Best Weapons for Clearing Salmonid Crowds
Crowded encounters favour weapons that can damage several enemies or quickly cover the ground with friendly ink. Being able to move is just as important as dealing damage, since even a powerful weapon becomes ineffective once Lesser Salmonids surround you.
Shooters are among the most dependable choices for general play. Their steady fire makes it easy to change targets, paint a route and continue attacking without committing to a long animation. They may not clear a group as dramatically as heavier weapons, but their flexibility makes mistakes easier to recover from.
Rollers and Brushes are better suited to players who prefer aggressive close-range movement. Their wider attacks can catch several nearby Salmonids, although charging directly into a group without an exit plan remains risky.
Sloshers also work well when enemies gather together or approach from behind cover. Their arcing attacks can reach awkward positions that a straightforward Shooter may struggle to hit.
Brellas take a more defensive approach. Opening the canopy can provide temporary protection while you reposition, reload or hold back an approaching group. Some variations can also launch the canopy forward, creating moving cover while you attack from behind it. They are not the fastest option for clearing large crowds, but they can make dangerous areas easier to control.
Blasters bring more explosive crowd damage, but every missed shot matters. Their slower firing rhythm can leave an opening for smaller enemies to move in, especially when the surrounding ground has not been painted.
Splatanas are useful when you want to cut through enemies directly in front of you. Quick slashes help against nearby Salmonids, while charged attacks can pressure tougher targets when an opening appears. Their narrower attack area demands careful positioning, since moving too deep into a crowd can leave little room to escape.
For most crowd-focused builds, the ideal weapon should provide:
- Reliable ground coverage
- A wide or forgiving attack pattern
- Fast recovery between attacks
- Enough mobility to avoid being boxed in
A Shooter paired with Splatellites is a comfortable starting point. The weapon keeps the ground painted, while the orbiting gadget damages Salmonids that move too close. A Slosher combined with Spinwheel offers a more aggressive alternative, using the gadget to open space when the crowd becomes too dense. Brellas can use Spinwheel when their defensive position begins to collapse, while Splatanas benefit from Dash Bomb when a close-range attack leaves them surrounded.
Best Weapons for Boss Salmonids
Boss encounters usually demand more than wide area damage. Some Boss Salmonids expose a vulnerable point only after a particular attack or require you to reach a specific angle before your weapon can deal meaningful damage.
Chargers are useful when a target appears at long range or above the surrounding crowd. Their charged shots can punish exposed weak points, but they require enough breathing room to aim. A Charger without defensive support can become difficult to use once smaller Salmonids reach your position.
Stringers provide another option for elevated targets and distant weak points. Their spread can cover a wider section of the battlefield, while carefully aimed shots concentrate more pressure on a smaller area. They are less straightforward than Chargers, so the statistics and special properties of each variation can make a noticeable difference.
Accurate Shooters offer a safer middle ground. They may not deliver the same burst damage, but they allow you to track moving targets while remaining mobile. They are particularly useful when you need to alternate quickly between a boss and the Lesser Salmonids protecting it.
Splatlings can apply strong sustained pressure during longer openings. The drawback is their charge time, which becomes dangerous when the stage is already crowded.
Blasters are useful when accuracy is difficult or several enemies are clustered around the target. Their explosions can maintain pressure across a wider area, though the slower fire rate makes sudden boss movements more punishing.
There is no universal boss weapon that removes the need to understand each enemy. Range, accuracy and movement all matter, but gadgets often decide whether you can use the weapon safely.
A Charger supported by Shot Pot and Torqscrew is one of Nintendo’s recommended examples. Shot Pot automatically attacks approaching Salmonids, while Torqscrew disrupts the group before it reaches your firing position. This gives the Charger time to focus on distant targets instead of constantly abandoning charged shots. The same defensive pairing can also help Stringers prepare cleaner attacks without being interrupted.
Best Weapons for Mobile Builds
Mobility becomes increasingly valuable when enemy ink, ranged attacks and several groups begin overlapping. Fast movement lets you correct a bad position before it turns into a failed raid.
Shooters fit mobile builds naturally because they can paint while moving and do not require a long setup. Dualies are another strong match for players who want to change direction quickly while maintaining pressure.
Brushes trade some precision for rapid movement and close-range aggression. They are useful when you prefer circling around a crowd rather than holding one position.
Blasters and Chargers are less mobile by themselves, but Speed Tank gadgets can cover that weakness. Nintendo specifically recommends Blast Boot or Dash Bomb for Blaster users because these gadgets create an escape without requiring the weapon to paint an entire route first.
A straightforward mobility loadout can include:
- Shooter, Dualies or Blaster
- Dash Bomb
- Blast Boot or Booyarang
Taking two movement gadgets gives you several ways to escape, but it also reduces the amount of passive damage and crowd control available. This setup works best when repositioning is the main problem rather than raw damage.
Best Weapons for Long-Range Builds
Long-range weapons are valuable because they can remove dangerous Salmonids before those enemies take control of the centre of the fight. The weakness appears when the distance disappears.
Chargers benefit the most from a protected firing area. Every interruption can waste a charged shot, so their gadgets should prevent nearby enemies from demanding constant attention.
Splatlings face a similar problem. They can maintain heavy fire once prepared, but charging while exposed leaves little room to react.
For this reason, Tactical Tank gadgets are often more useful than adding another direct attack. Shot Pot watches nearby enemies while you aim, and Torqscrew can disturb a group moving toward your position.
Nintendo’s suggested Charger setup combines:
- Charger
- Shot Pot equipped with knockback gas
- Torqscrew
The weapon handles distant targets. Shot Pot pressures approaching enemies and uses knockback gas to keep them away, while Torqscrew creates additional room when a larger group breaks through.
This is one of the clearest examples of good loadout design. Neither gadget attempts to replace the Charger. Both protect the conditions the weapon needs in order to work properly.
Best Speed Tank Gadgets
The Speed Tank is built for players who value quick movement, emergency escapes and rapid changes in position. Its gadgets are especially useful with weapons that cannot paint safe routes under pressure.
Blast Boot
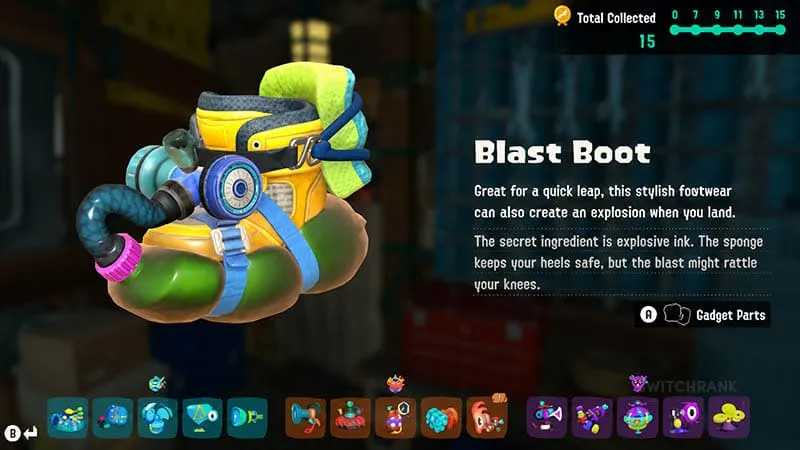
Blast Boot launches you forward and creates an explosion when you land. It works as both a movement tool and a close-range attack.
Its greatest strength is how quickly it removes you from a crowded area. A slower weapon may not have enough time to paint a path, but Blast Boot lets you leave before the group fully closes around you.
The landing explosion can damage nearby Salmonids, although escape should remain the priority. Jumping into another crowd simply replaces one problem with a louder one.
Dash Bomb
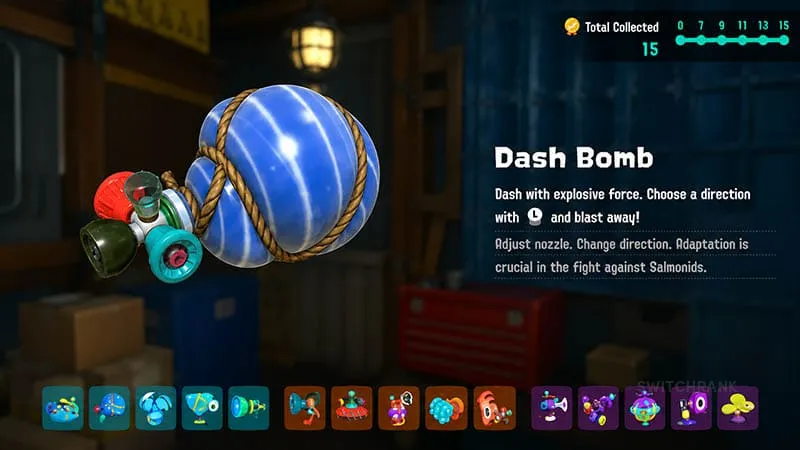
Dash Bomb moves you rapidly in a chosen direction and follows the movement with an explosion. Unlike a straightforward forward leap, it can be used to retreat, move sideways or close the distance on a vulnerable target.
This control makes Dash Bomb useful in cramped spaces where a badly aimed movement ability could leave you against a wall. It is also a practical way to cross enemy ink without spending valuable seconds painting a complete route.
Booyarang
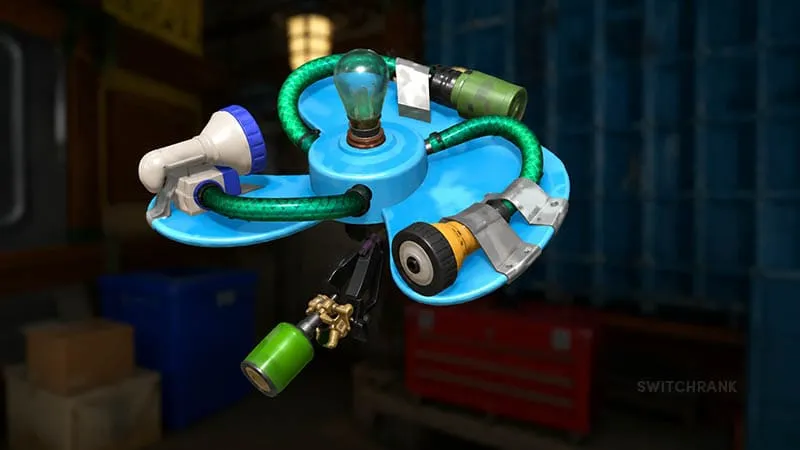
Booyarang travels outward, damages enemies and returns after remaining in the air briefly.
It is a flexible choice when you want additional range without committing to a stationary attack. Its return path may also catch enemies that move into the area after the initial throw.
Booyarang does not provide the same emergency movement as Blast Boot or Dash Bomb, but it gives mobile weapons another source of damage while allowing the player to keep moving.
Best Power Tank Gadgets
Power Tank gadgets are designed for direct confrontation. They work well when your weapon needs additional crowd damage, a way to break through defences or an emergency close-range response.
Splatchet
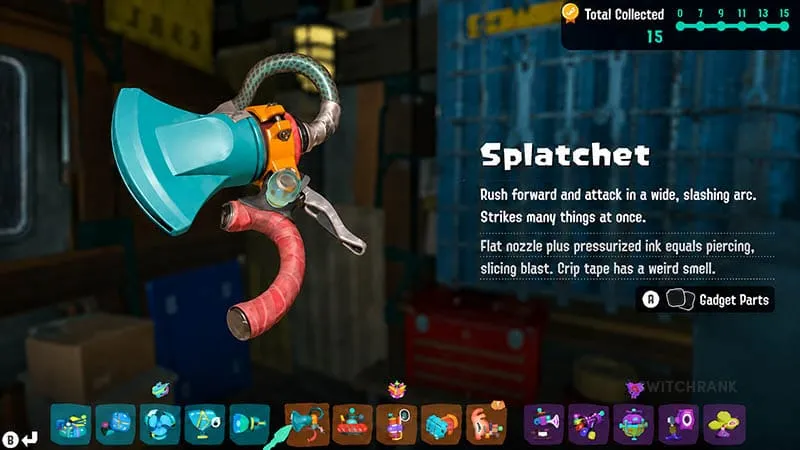
Splatchet performs a wide slashing attack and can cut through Salmonid armour. Its broad arc makes it useful when several enemies occupy the same space or when a protected target blocks your route.
It pairs well with weapons that lack immediate close-range power. However, its limited reach means it cannot solve every boss encounter by itself.
Splatellites
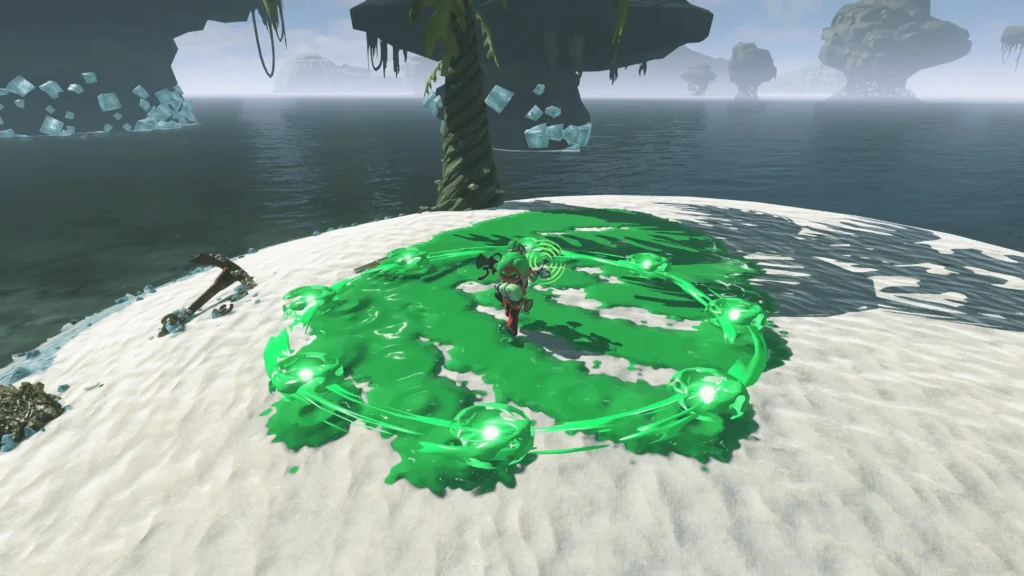
Splatellites orbit around the player, painting the ground and damaging enemies that come close.
They are particularly helpful with weapons that require time to charge or aim. The discs continue providing pressure while you concentrate on a larger target, making them a practical defensive choice when Lesser Salmonids repeatedly interrupt your attacks.
Splatellites are also easy to understand and use, which makes them a reliable option while you are still learning how the different gadget cooldowns fit together.
Spinwheel
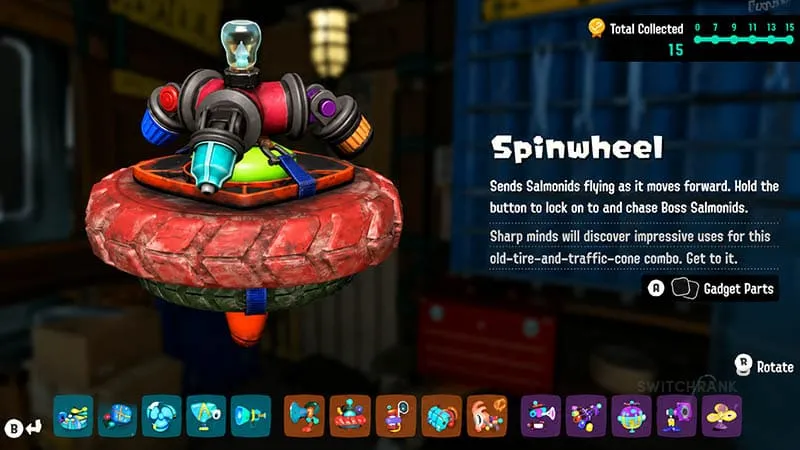
Spinwheel moves forward, sprays ink and knocks away Salmonids along its path. Holding the input allows it to lock onto and chase Boss Salmonids.
Its main value comes from creating a route through a packed group. Rather than remaining trapped behind the crowd, you can send Spinwheel forward and follow the opening it creates.
The boss lock-on adds sustained pressure, but positioning still matters. Sending it after the wrong target may leave you without crowd control when the surrounding enemies close in.
Best Tactical Tank Gadgets
Tactical Tank gadgets are built around preparation, automatic attacks and control of specific areas. They are a natural match for Chargers, Splatlings and other weapons that become stronger when given time to operate.
Shot Pot
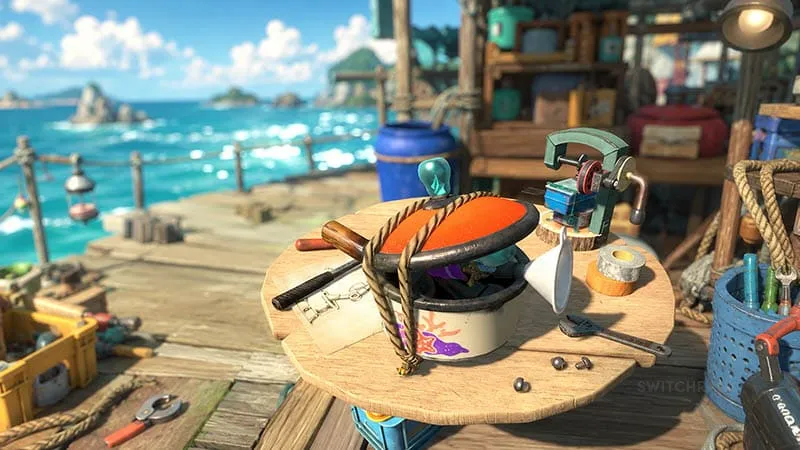
Shot Pot is a deployable turret that automatically attacks nearby Salmonids and crates.
The main advantage is divided attention. While Shot Pot deals with a smaller enemy, you can focus your weapon on a boss or another dangerous target.
Gadget parts can change its purpose. Adding knockback gas turns it into a defensive tool that protects a slower or more stationary build. This is why it forms an important part of Nintendo’s recommended Charger combination.
Torqscrew
Torqscrew creates a vortex when placed on the ground or a wall. Its rotating blades disrupt nearby Salmonids and throw them away from the area.
It is better viewed as crowd control than simple damage. Torqscrew protects your position, interrupts a group and creates the time needed to charge or aim a slower weapon.
Pairing it with Shot Pot works particularly well. The vortex delays approaching enemies while the turret continues attacking them.
Tether Wail
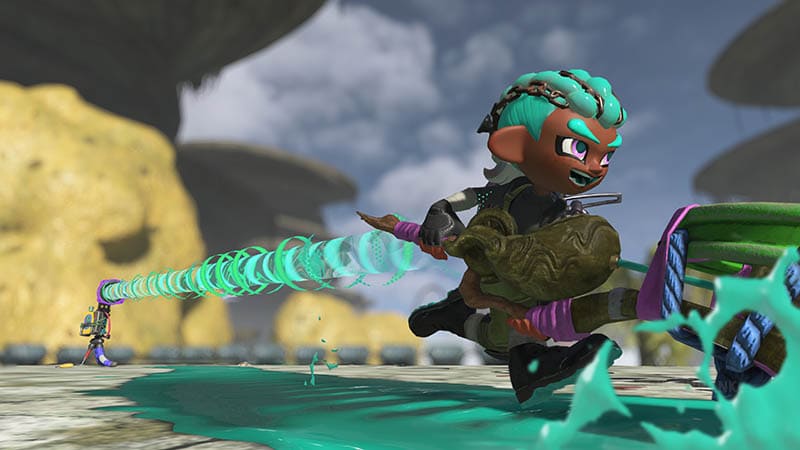
Tether Wail creates a damaging laser connection between the gadget and your Tank. Enemies caught along the line take damage, and extending the connection increases the beam’s size and power.
This gadget rewards active positioning. Rather than dropping it and forgetting about it, you need to move so that the beam passes through the enemies you want to hit.
It can be effective against groups moving through a predictable route or larger targets that remain exposed long enough for the connection to build.
Bombloons
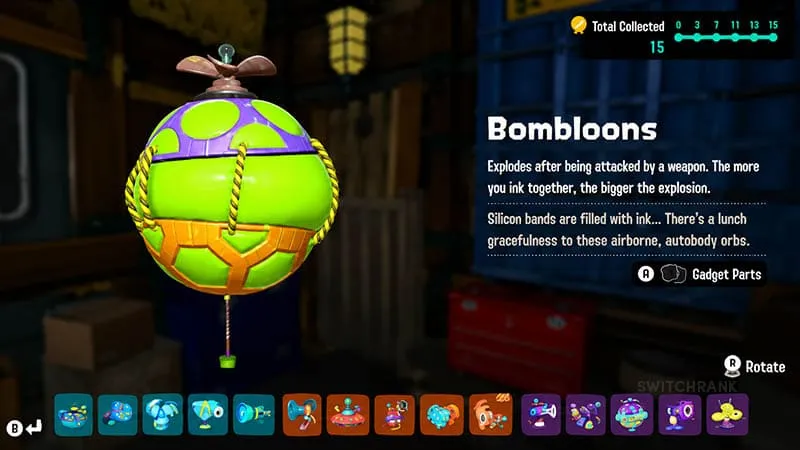
Bombloons can be linked together and detonated by shooting them. Connecting additional Bombloons increases the resulting explosion.
They work best when you have time to prepare the battlefield. Narrow routes and predictable enemy approaches allow you to create a useful chain before the group reaches your position.
Bombloons become less dependable when Salmonids are already surrounding you. In those moments, an immediate control tool such as Torqscrew is usually easier to use.
How Gadget Parts Improve Your Build
The standard version of a gadget only shows its basic purpose. Gadget parts can increase properties such as damage, fire rate and active duration. Some also add secondary effects, including ink explosions and knockback gas.
As a result, the same gadget can support several different builds.
A normal Shot Pot provides automatic damage. Adding knockback gas makes it better at protecting a stationary weapon. Increasing a gadget’s duration may be more valuable for area control, while offensive parts can help finish enemies faster.
Avoid upgrading every gadget at once. Materials are better spent on the tools you regularly use and the weaknesses that repeatedly cause trouble.
Nintendo recommends experimenting on the test range before investing heavily. Targets, rails and other practice objects let you compare damage, range and movement without risking a raid.
Which Splatoon Raiders Loadout Should You Use?
The best weapons and gadgets in Splatoon Raiders depend on which part of combat causes you the most trouble.
For crowds, start with a Shooter, Slosher or another weapon that provides dependable area coverage. Splatellites and Spinwheel can stop the group from controlling the space around you.
For Boss Salmonids, use an accurate weapon with enough range to reach exposed targets. Your gadgets should keep smaller enemies away rather than duplicate the weapon’s damage.
For mobile play, combine a Shooter, Dualies or Blaster with Dash Bomb or Blast Boot. These gadgets help you escape without first painting a perfect route.
For long-range combat, the Charger, Shot Pot and Torqscrew combination remains one of the most complete starting setups. It gives the weapon time to aim while the gadgets manage nearby pressure.
No setup remains perfect on every island. Enemy placement, terrain and the special properties attached to your equipment will continue to change what works best.
The strongest loadout is the one in which every tool has a clear responsibility. Let your weapon handle the main target, then use gadgets to control the enemies, distances or movement problems that would otherwise prevent it from doing that job.

