

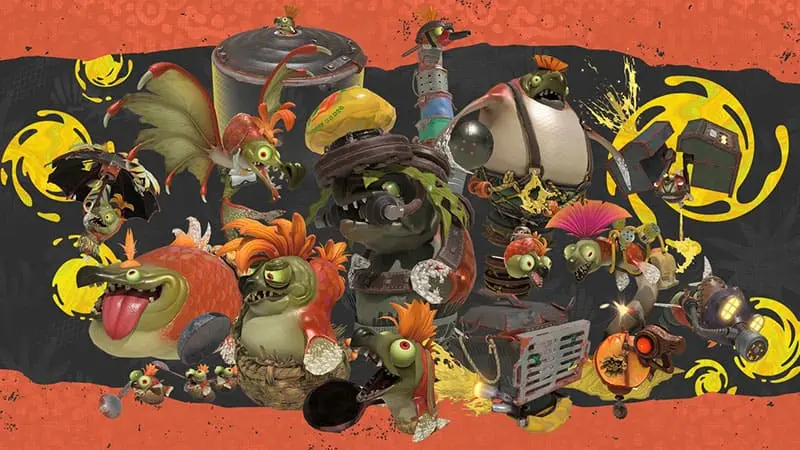
Boss Salmonids can turn a routine raid into a crowded mess within seconds. Some chase you across the arena, others attack from positions your weapon can barely reach, and several become far more dangerous when you leave them alive beside another boss.
That is why learning how to beat every Boss Salmonid in Splatoon Raiders is not only about memorising weak points. You also need to recognise which enemy is controlling the battlefield, which target can wait and when attacking the largest creature first is actually the wrong decision.
This guide explains how to defeat every regular Boss Salmonid, including its main mechanic, exposed weakness and the safest approach for solo or co-op play.
Seasoned Salmonids are not covered here. Those enhanced variants use modified attacks and deserve their own strategies.
How Boss Salmonids Work in Splatoon Raiders
Regular Boss Salmonids are stronger than the Lesser Salmonids encountered throughout most raids. Defeating one gives you a Mega Power Egg, providing additional energy for the Exploration Bot.
Most bosses cannot be handled efficiently by firing at whichever body part happens to be closest. A Scrapper protects its front, Steelhead hides its real weakness until it attacks, and Stinger must be dismantled piece by piece. Understanding these mechanics saves ink and prevents longer fights from spiralling out of control.
Target selection matters just as much as accuracy. Smoker strengthens nearby enemies, Stinger attacks through obstacles, and Slammin’ Lid continues adding Salmonids to the arena. Leaving one of them active can make every other boss harder to manage.
Your equipment also changes the safest approach. Long-range weapons can reach airborne targets more easily, while fast or mobile setups help you circle protected bosses. Wide attacks are particularly useful against grouped enemies or bosses with several destructible parts.
How to Beat Salty Tongue
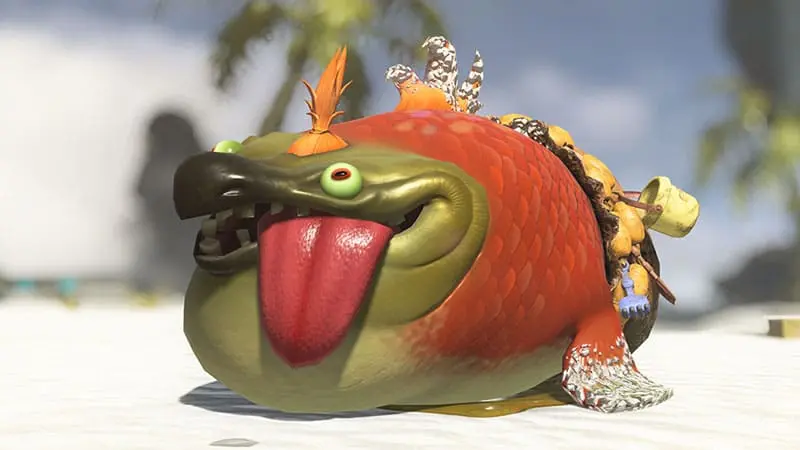
Salty Tongue does not hide behind armour or expose a special mechanical weak point. Its challenge comes from durability and a powerful bite that follows a sudden extension of its neck.
Watch the creature itself rather than staring at your aiming reticle. The moment its neck begins stretching forward, move sideways instead of retreating in a straight line. Backing away often keeps you directly inside the path of the bite, while a side dodge places you beside the boss and leaves you close enough to counterattack.
Try to fight Salty Tongue in an open section of the arena. Walls, corners and groups of Lesser Salmonids can remove the space needed to avoid its lunge. Once the bite misses, use the recovery period to deal steady damage.
There is no hidden shortcut here. Reliable movement and sustained fire work better than waiting for an opening that never arrives.
How to Beat Salivator
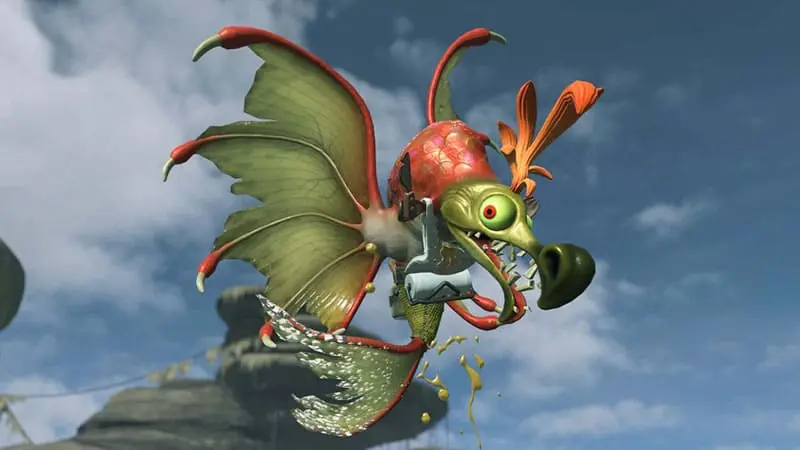
Salivator remains above the battlefield and throws drool bags that produce whirlwinds. Short-range weapons may struggle to reach it from the ground, but the boss also creates the tool needed to close that distance.
Shoot one of the drool bags and step into the resulting updraft. It carries you high enough to attack Salivator from a much cleaner angle. This is usually more effective than emptying ink upward and hoping enough shots connect.
Before using the updraft, clear the area around your landing point. Taking off while several Lesser Salmonids are waiting underneath can leave you trapped as soon as you return to the ground.
Long-range equipment can pressure Salivator without relying on the whirlwind. Close-range builds, however, should use the boss’s own attack against it. Deal with Salivator sooner in enclosed arenas, where its whirlwinds can block movement routes and make other attacks difficult to avoid.
How to Beat Scrapper
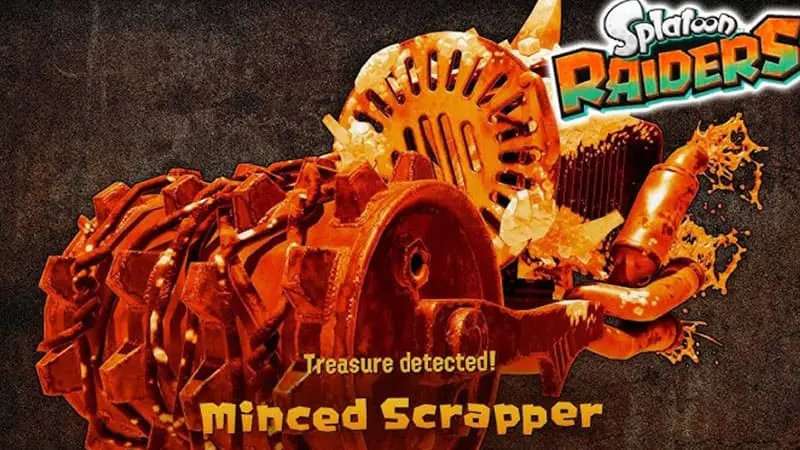
Scrapper charges from behind a heavy frontal shield. Shooting that shield does not immediately hurt the operator, but sustained fire eventually disables the vehicle and forces it to stop.
The moment Scrapper stalls, stop attacking the front and begin moving around it. Its pilot is exposed at the rear, and this is where your shots need to land. The opening is brief, so continuing to fire into the disabled shield only wastes valuable time.
Shield-piercing attacks provide another option. Equipment designed to break strong defences, including the Splatchet, can damage Scrapper from the front when the arena is too cramped for a safe flank.
Co-op teams can make this encounter much easier. One player keeps Scrapper facing forward while another attacks the operator from behind. During solo raids, try to disable it in open ground so you have enough room to circle the vehicle without becoming trapped.
How to Beat Stinger

Few Boss Salmonids deserve a faster response than Stinger. It fires a long stream of ink from extreme range, and the attack can pass through obstacles. Hiding behind cover will not solve the problem for long.
The pilot stands on a tower made from seven pots. Ignore the Salmonid at the top and destroy the supports beneath it. Each broken pot lowers the tower until the pilot falls into the stove at the bottom.
Wide attacks or gadgets capable of hitting several parts can shorten the process considerably. Even with a standard weapon, focusing from the bottom upward is more efficient than aiming at the pilot.
Approach Stinger while moving sideways. Running directly toward it allows the beam to remain centred on your path. Once you reach the tower, commit to breaking the pots quickly.
Stinger should rarely be left alive while you fight a slower close-range boss. Its ability to pressure you from almost anywhere can turn a manageable encounter into a frantic chase.
How to Beat Steelhead
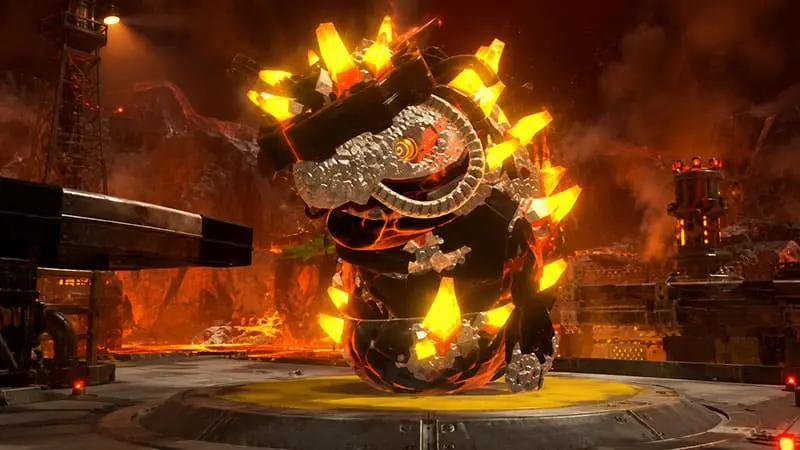
Firing repeatedly into Steelhead’s scaled body is possible, but it is one of the slowest ways to defeat it. The real opportunity appears when the creature begins forming a bomb above its head.
Aim at the bomb while it inflates. Destroying it triggers a powerful explosion that defeats Steelhead and can damage nearby Salmonids. Good positioning therefore allows you to remove the boss and part of the surrounding crowd with the same attack.
Limited-range weapons need to prepare before the bomb appears. Move closer, find elevated ground or create a clear shooting angle while Steelhead is still approaching. Waiting until the bomb is almost complete may leave too little time to reach it.
Do not stand directly in front of the boss while preparing the shot. A completed bomb covers a large section of the arena and can force you away from your escape route.
Body damage should be treated as a backup option when your weapon cannot consistently hit the bomb.
How to Beat Big Shot
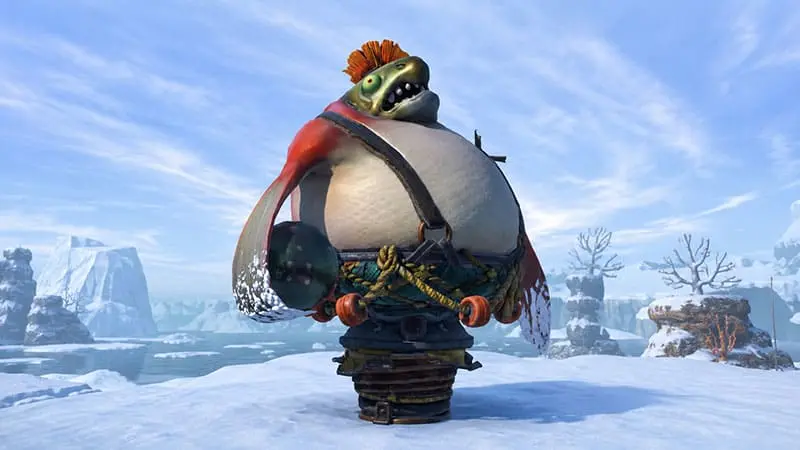
Big Shot lifts a cannonball and drives it into the ground, sending a shock wave across the nearby area. You cannot remove that wave with ink, but you can jump over it.
Timing is more important than height. Wait until the wave is close before jumping, then resume your attack immediately after landing. Leaping too early may cause you to come down directly on top of it.
The windup before Big Shot slams the cannonball is your best damage window. The boss remains committed to the animation, allowing you to fire without chasing a moving target.
Multiple Big Shots can become much more dangerous because their shock waves overlap. Removing one quickly reduces the number of jumps you need to time at once.
The final blow also creates a damaging shock wave. Whenever possible, defeat Big Shot while Lesser Salmonids are standing nearby and let the explosion clear part of the arena for you.
How to Beat Fish Stick
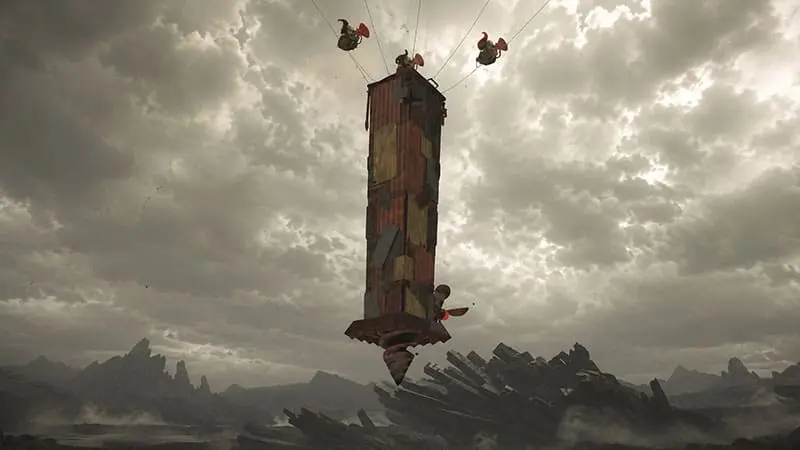
Fish Stick begins as a group of Smallfry carrying a large stake. Once they plant it, the Smallfry circle above the pole and spread enemy ink across the surrounding ground.
Your main objective is to defeat every Smallfry flying around the top. Cover the stake with your ink, swim upward and attack them at close range. This method gives you a clear shot and avoids wasting ink from below.
You can also target the propellers near the lower section. Damaging them brings the formation closer to the ground, making the Smallfry easier to hit without climbing.
Fish Stick may not appear as threatening as Stinger or Flyfish, but its ink can quietly ruin your movement. Escape paths disappear, objectives become harder to approach and dodging another boss takes more effort.
Remove it quickly when it lands near an important route or in the middle of a small arena. In a larger space, more aggressive ranged enemies can usually be handled first.
How to Beat Steel Eel
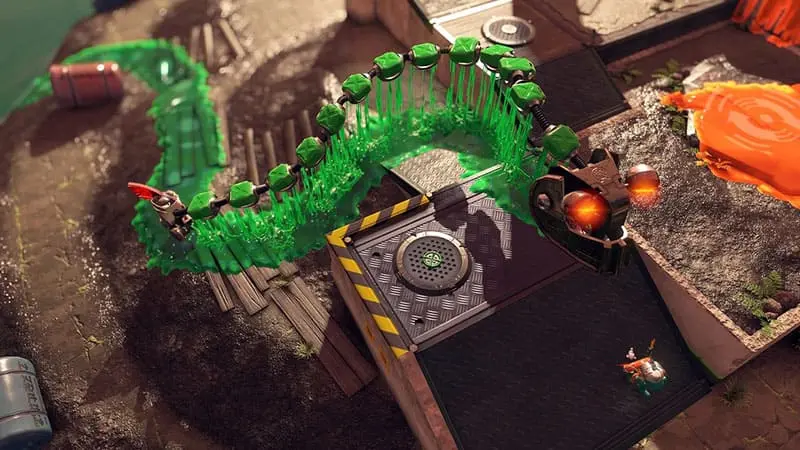
Steel Eel follows its target with a long, ink-spraying body that can cut the arena in half. Its metal head cannot be damaged, so attacking from the front accomplishes nothing.
The operator is positioned at the very back. Lead Steel Eel toward open ground, make a wide turn around its body and fire at the pilot once you reach the tail.
Avoid narrow passages. The machine’s length can block your route, while its head continues following from the opposite side. A sharp, deliberate turn works better than constant zigzagging because it creates a wider gap between the front and rear sections.
Movement gadgets and crowd-control tools are especially valuable when Lesser Salmonids surround the pilot.
In co-op, the player being chased should concentrate on creating space while a teammate attacks the rear. Solo players need more patience. Forcing your way past the body usually causes more trouble than waiting for a clean opening.
How to Beat Slammin’ Lid
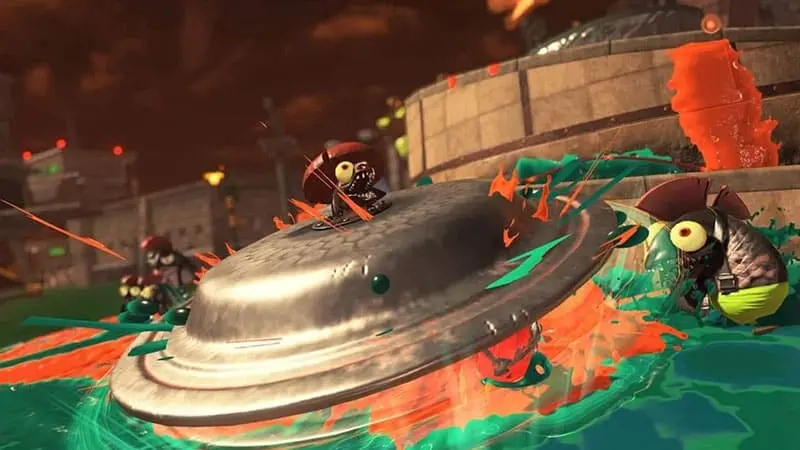
Slammin’ Lid floats inside a protected saucer and continuously summons additional Salmonids beneath it. The longer it survives, the more crowded the encounter becomes.
Shooting the protected underside is not the answer. Step briefly inside its force field to trigger the slam, then move back out before the craft crashes into the ground. Once it lands, climb on top and attack the exposed pilot.
The slam can damage other Salmonids caught underneath. You can use this to your advantage by allowing several enemies to gather inside the field before triggering the attack.
Solo players have less room for error because the same person must bait the slam, avoid the impact and reach the top before the saucer rises. Prepare a painted route in advance so you can climb immediately after it lands.
Slammin’ Lid deserves early attention. Ignoring it allows a small fight to grow far beyond what your weapon or gadgets can comfortably control.
How to Beat Flyfish
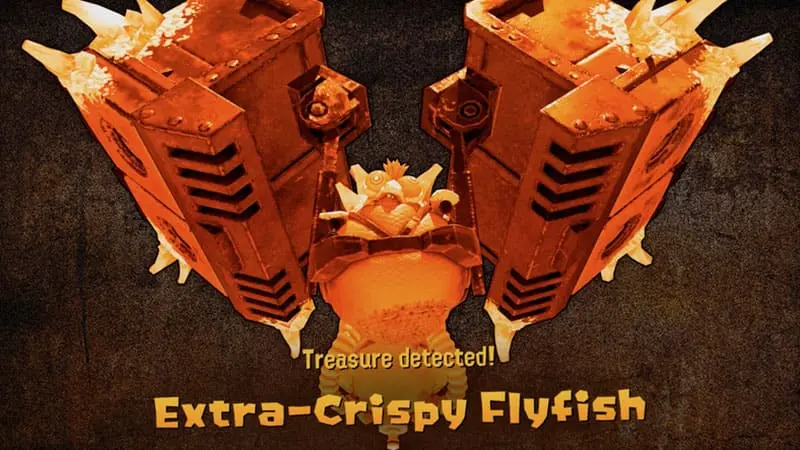
Flyfish hovers over the arena and launches groups of tracking missiles from two shoulder-mounted containers. These launchers behave differently from their Salmon Run counterparts: throwing bombs into them will not destroy the boss.
The vulnerable target is the pilot inside the central cockpit. Aim between the launchers and attack from the front or rear. Shots that strike the missile containers deal no useful damage.
Keep moving while lining up your attack. Standing still allows the missile indicators to overlap around you, creating a large blast zone with very little room to escape.
Long-range weapons can reach the cockpit without entering the most dangerous part of the arena. Mobile close-range builds can still defeat Flyfish, but they should advance between missile volleys rather than charging directly through the incoming attack.
Do not leave Flyfish active while focusing on another boss. Its missiles follow you across the battlefield and make every other dodge more difficult.
How to Beat Smoker
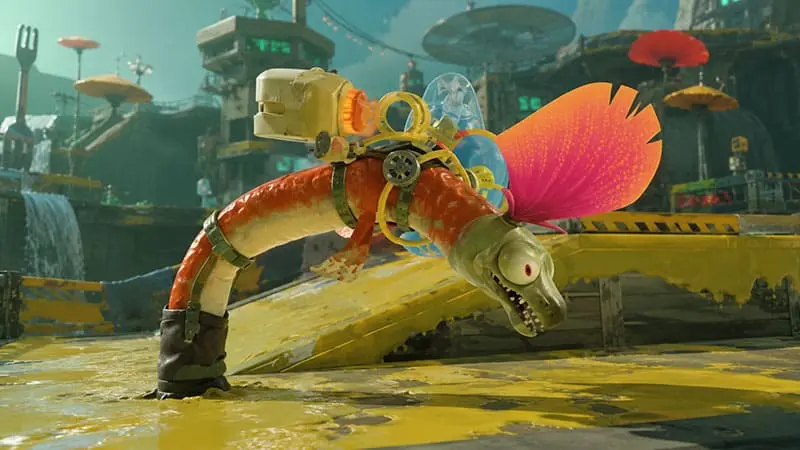
Smoker is not especially durable, but the device on its back strengthens nearby enemies. A group of ordinary Lesser Salmonids can become much harder to clear, while durable bosses take even longer to defeat inside the effect.
This makes Smoker one of the most important targets despite its modest appearance.
Locate it through the smoke and attack directly. There is no armour puzzle or short damage window to manage, and its low health means standard weapon fire should remove it quickly.
Do not allow a larger boss to distract you. Steelhead or Salty Tongue may look more dangerous, but defeating Smoker first weakens every enemy standing nearby.
Wide attacks help when it hides behind a crowd. Save stronger gadgets for situations where Lesser Salmonids prevent you from reaching it safely; otherwise, direct shots are usually enough.
How to Beat Goldie
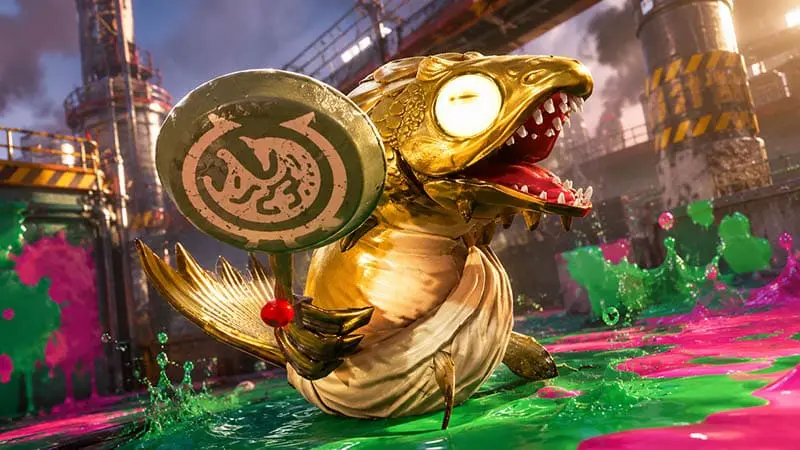
Goldie does not behave like a normal combat boss. It will not attack you, but it eventually tries to escape. Defeating it rewards you with a large amount of Spirhalite Shards.
Begin firing as soon as Goldie appears because it has a substantial health pool. Keep the ground painted ahead of you and maintain pressure while it moves through the area.
Movement gadgets can help you stay close, although spending a valuable resource depends on how urgently you need the reward. Do not chase blindly through missiles, smoke or a crowd of Lesser Salmonids.
Goldie is an optional prize rather than a survival priority. Deal with any Stinger, Flyfish or Smoker that prevents a safe pursuit, then return your attention to Goldie before it escapes.
Which Boss Salmonid Should You Defeat First?
There is no perfect order for every raid. Arena size, weapon range and the number of enemies already present can all change which target creates the greatest danger.
As a general rule, support enemies and long-range attackers should be removed before slow bosses that need to approach you.
A practical priority order is:
- Smoker
- Stinger
- Flyfish
- Slammin’ Lid
- Steel Eel
- Steelhead
- Big Shot
- Salivator
- Scrapper
- Fish Stick
- Salty Tongue
Smoker ranks first because it strengthens the entire group around it. Stinger and Flyfish follow because both can interfere from long range while you fight something else. Slammin’ Lid also needs a quick response because it continuously brings more Salmonids into the encounter.
Treat this order as guidance rather than a fixed rule. A Steel Eel blocking a narrow corridor may become the immediate threat. Fish Stick can also jump several places in the ranking when it covers an objective or destroys your only safe movement route.
Goldie is not included because it poses no direct threat. Chase it only when the battlefield is controlled well enough to justify the reward.
Best General Strategy for Boss Salmonids
The safest way to beat every Boss Salmonid in Splatoon Raiders is to identify its mechanic before committing to an attack.
Ask three simple questions during an encounter:
- Does the boss have an exposed operator?
- Is there a destructible part that causes extra damage?
- Does the boss need to attack before its weakness appears?
Scrapper and Steel Eel require access to their pilots. Steelhead becomes vulnerable through the bomb above its head. Stinger must be destroyed from the bottom, while Flyfish demands accurate shots into its central cockpit. Slammin’ Lid only lowers its guard after being baited into a slam.
Keep part of the arena covered in your ink before starting a longer attack sequence. An escape route matters more than a few extra shots when missiles, shock waves and Lesser Salmonids begin overlapping.
Solo players benefit from movement tools, automatic gadgets and crowd control. Co-op groups can divide the encounter more efficiently: one player manages Lesser Salmonids while another targets the boss’s weak point.
Once these patterns become familiar, individual bosses are not the hardest part of a raid. The real challenge is recognising which enemy is making the entire battlefield more dangerous and removing it before everything turns into fish-flavoured chaos.
Final Tips
Understanding how to beat every Boss Salmonid in Splatoon Raiders will make regular raids far more manageable, but memorising weaknesses is only the beginning.
Prioritise enemies that attack from a distance, strengthen their allies or summon reinforcements. Preserve a painted escape route, avoid wasting shots on armoured sections and use one boss’s attack against nearby Salmonids whenever the opportunity appears.
A good raid is not always won by dealing the most damage. Sometimes it is won by noticing the Smoker hiding behind everyone else before it turns the entire Salmonid army into a wall with legs.

